
Resonance of Fate Enhanced Remaster Guide: Mastering the Unique Combat System
This guide breaks down the core systems of Resonance of Fate, offering actionable strategies to help you navigate battles, manage your resources, and pull off.
Resonance of Fate is notorious for its distinct, deeply tactical combat system. For newcomers and returning players diving into the enhanced remaster, the game’s blend of real-time movement, turn-based pacing, and complex mechanics can initially feel overwhelming. However, once you grasp the foundational rules of movement, damage types, and team-based maneuvers, the gameplay opens up into a fast-paced, highly rewarding tactical experience.
This guide breaks down the core systems of Resonance of Fate, offering actionable strategies to help you navigate battles, manage your resources, and pull off devastating combos.
1. Understanding the Basics of Movement and Turn Economy
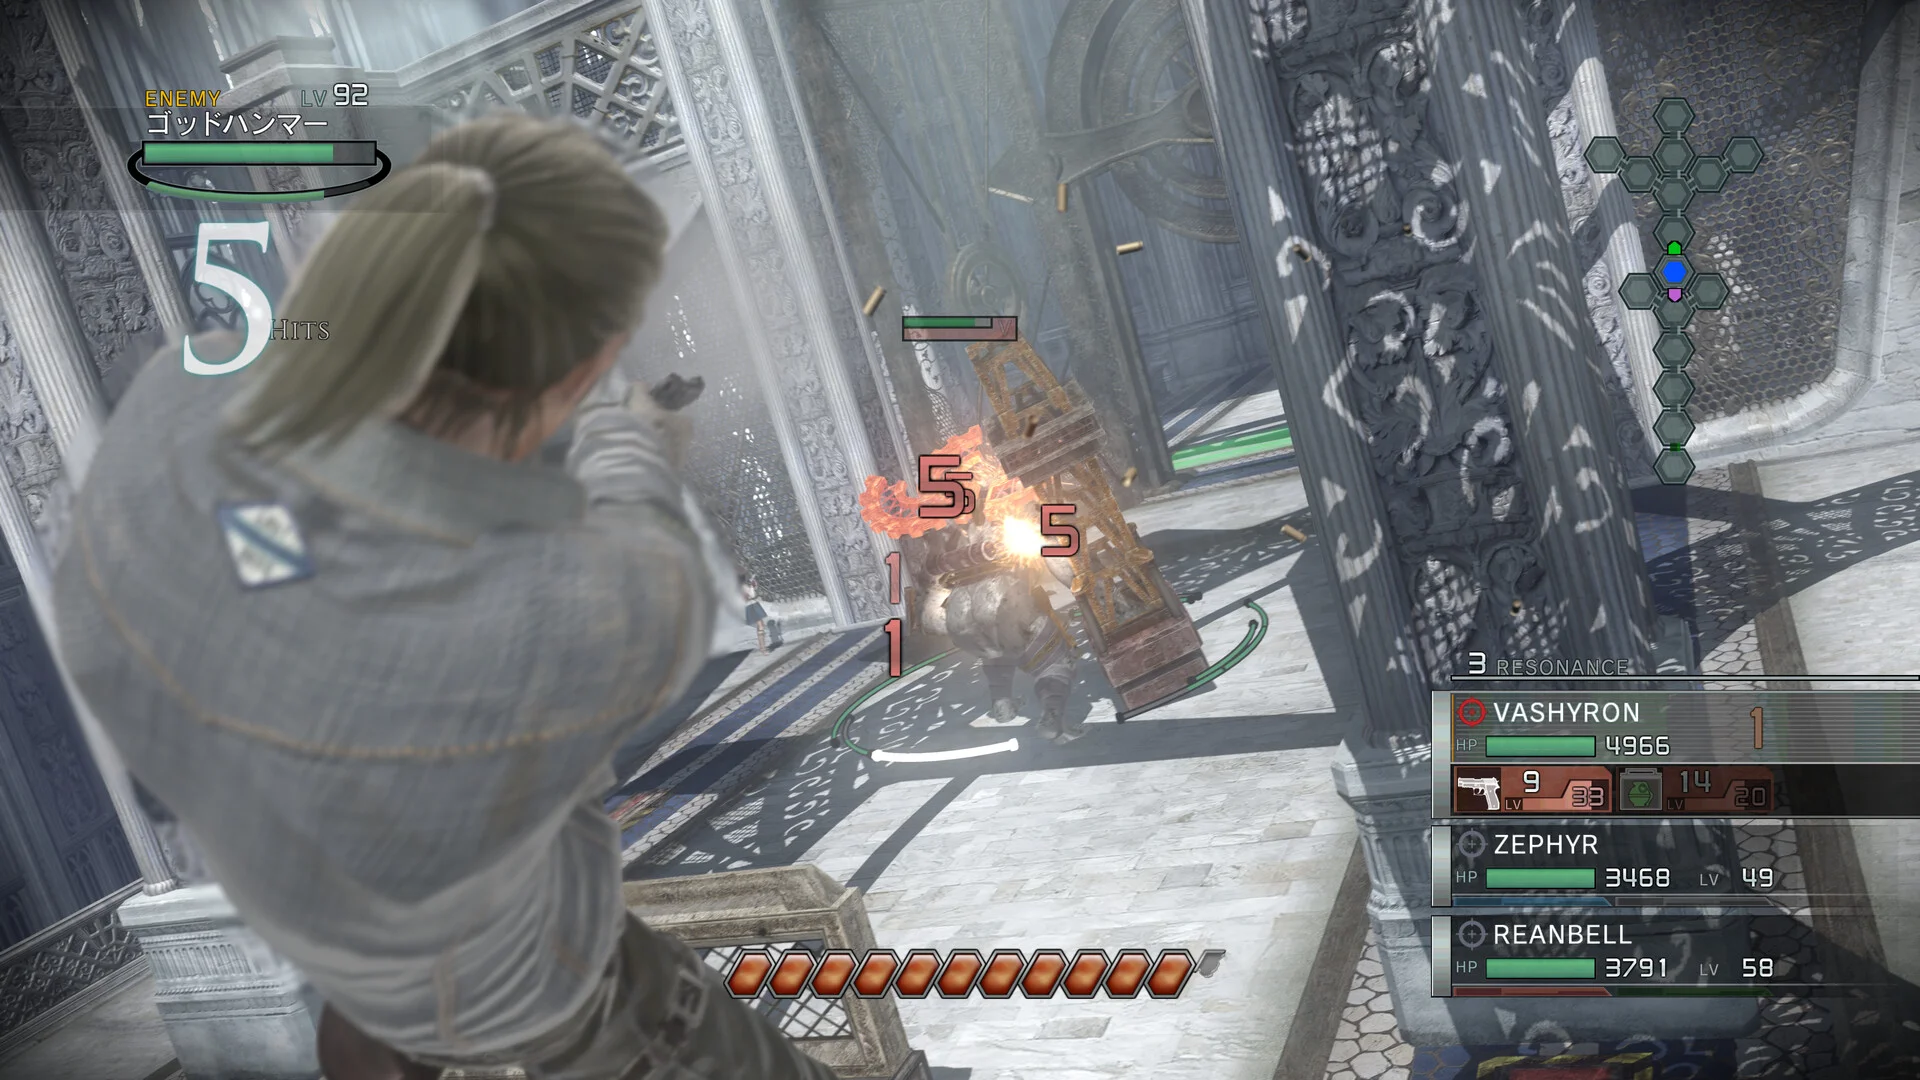
Combat in Resonance of Fate operates on a semi-real-time system governed by your character's action bar.
- The Blue Action Bar: Displayed directly beneath your character’s name, this bar depletes as you move or perform actions.
- Time Flow: If you keep a character completely stationary, time freezes for all combatants, allowing you to assess the field. The moment you move or execute an action, time resumes for both your party and the enemies. Managing this flow is critical to positioning yourself safely.
- Enemy Targeting Indicators: Below each enemy's HP bar lies a secondary charge bar that fills up with orange and turns red when they are ready to strike. Pay attention to the letters displayed alongside these indicators—they denote which party member is currently in the enemy's crosshairs ($\alpha$, $\beta$, or $\zeta$ for Zephyr; $V$ for Vacheron; $B$ for Bale).
2. Damage Types: Direct vs. Scratch Damage
One of the most important tactical distinctions in the game is how your weapons deal damage. Enemies feature a green HP bar, but your weapons handle this health pool in two entirely different ways:
- Pistols (Direct Damage): Pistols are your primary method for inflicting direct damage. They are the only weapon type capable of reducing an enemy's green HP bar directly.
- Machine Guns (Scratch Damage): Machine guns deal massive amounts of "scratch damage." This does not deplete the green HP bar immediately; instead, it converts that section of the health bar into a temporary blue bar.
- The Conversion Loop: The core rhythm of combat relies on synergy between these two weapon classes. First, use machine guns to blanket an enemy's health pool in blue scratch damage. Immediately follow up with a pistol or grenade attack to convert that accumulated scratch damage into permanent direct damage.
- The Decay Factor: Scratch damage is not permanent. If you wait too long to convert it, the enemy will slowly regenerate their health back to green.
3. Navigating Enemy Shields and Armor
Many formidable enemies are protected by extra green bars representing shields, physical armor plates, hats, or equipped weapons.
- Breaking Parts: Destroying these external shields not only exposes the enemy’s main body to direct attacks but also shatters the corresponding physical component.
- Tactical Positioning: Depending on the size, orientation, and placement of a shield, you can sometimes bypass them completely with smart positioning or angled attacks, allowing you to target the main body for a faster victory.
4. Normal Attacks and Charge Multipliers
If you choose to fight while standing still, you can perform normal attacks by pressing the attack button to initiate a charge animation.
- Building Multipliers: Pressing the attack button a second time executes the attack. On the right side of the screen, you will notice a damage multiplier that increases the longer you maintain the charge.
- Managing the Action Bar: You must trigger your attack before the action bar fully depletes; otherwise, your attack will be canceled entirely.
- Distance Matters: Charge times are directly affected by proximity. Standing closer to an enemy speeds up your charge time, while standing at a distance lengthens it.
5. Hero Attacks and Bezel Management
Hero attacks represent the true turning point in mastering Resonance of Fate's combat flow. These special maneuvers consume a bezel shard from your stock and launch your character into a dynamic running path across the arena.
- Executing a Hero Attack: Select a destination path and press the hero attack button again to initiate the run. You can fire your weapons at any point during the run as soon as a charge bar fills, or you can delay your attack to build a higher damage multiplier.
- Air Attacks: You can input a jump command during a hero attack path. This launches your character into the air, allowing you to perform aerial assaults from unique vantage points to bypass enemy shields or close the distance quickly.
Resonance Points
While executing a hero attack, pay attention to the trajectory line connecting your movement path. If your path crosses directly between two of your stationary allies, the line turns blue. Successfully routing your run through an ally grants you a Resonance Point.
- Resonance points are displayed on the right side of the screen above the character list.
- You will lose accumulated resonance points if you fail to gain a new one on your next turn, or if you resort to normal attacks or basic movement. Keeping your momentum going with continuous hero attacks is vital to preserving these points.
6. Advanced Combat: Tri-Attacks, Smackdowns, and Bonus Shots
Once you have mastered the basics, high-level combat tactics allow you to turn the tide against tougher bosses and mobs.
- Tri-Attacks: Requiring at least one resonance point and consuming a single bezel shard, a tri-attack orders all three party members to execute a coordinated hero attack simultaneously. The characters move in a triangular formation, making your entire party immune to damage while recovering scratch damage and unleashing continuous fire. The more resonance points you hold, the longer the team will run in formation, granting you extended windows for offense.
- Smackdowns: When an enemy is launched into the air, you can perform a jump and shoot from a higher elevation than your target. This slams the enemy down into the ground, dealing splash damage across all active shields and forcing them to drop item rewards.
- Bonus Shots: Hitting a floating airborne enemy multiple times from the ground can randomly trigger a bonus shot, indicated by a yellow meter. Landing your cursor on this meter during the subsequent spinning animation triggers a supercharging attack loop. Successfully executing a bonus shot deals massive damage and causes the enemy to drop valuable silver and gold chips that can be sold for cash.
By understanding how to balance machine gun scratch damage with pistol conversions, time your hero paths, and chain together tri-attacks, you will easily conquer the challenges awaiting you in Resonance of Fate Enhanced Remaster.
Next guides4
 Release
Resonance of Fate Enhanced Remaster Release Date: What We Know and What to Expect
PlatformsResonance of Fate Enhanced Remaster on PS5: What to Expect from tri-Ace's Cult Classic
PlatformsPlaying Resonance of Fate on the Steam Deck: Performance, Setup, and Compatibility
Platforms